How to move a table from Excel into Word without error
Make calculations and draw up a table more conveniently in Excel if you want to work with numeric data. In fact the program is a table. Word for such work is not quite fit.
But sometimes you have to migrate from an Excel table to Word. Also you may need to convert filled data. Converting from one format to another is unproductive and takes too much time. There should be another way.
How to move a table from Excel to Word?
The first method.
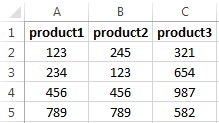
- We have a table with three columns and five rows. The boundaries are set.
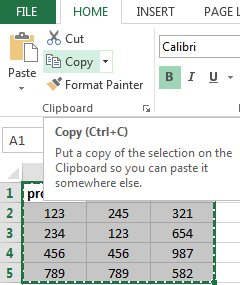
- Select the data range. Click Copy in the main menu. Alternatively use the key combination Ctrl + C. Also you may select table and click the right mouse button. Than choose and click «Copy».
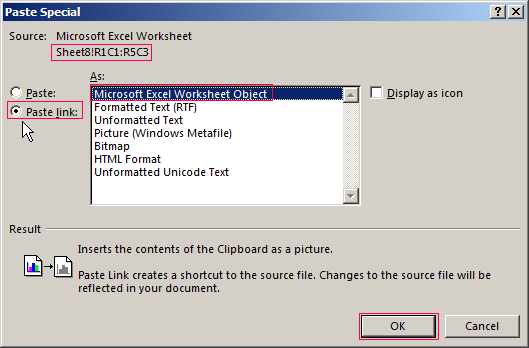
- Open the Word List. In the main menu use «Paste» tool. Select the «Paste Special».
- We set the parameters of a special paste. «Paste Link» - «Microsoft Excel Worksheet Object». Check is the source for insert selected correctly. Click OK.

The result of our work:
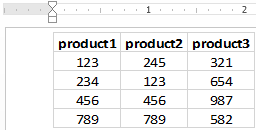
This method has some drawbacks:
- table inserted as a graphic object that is it cannot be edited.
- border spreadsheets may extend beyond the sheet.
The second method.
- Select a table in MS Excel. Copy it to the clipboard.
- Open MS Word. Click «Paste» or use the key combination CTRL+V (Shift+Ins). The result is next:
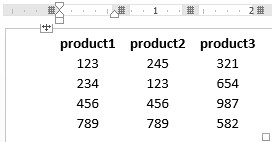
We can edit the data, change borders, font values and format.
This method of insertion has one significant drawback. Table with a large amount of data goes beyond the sheet.
The third method.
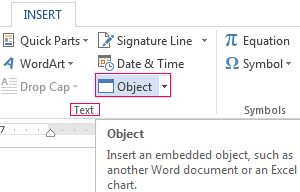
- Go to the tab «INSERT» in In Word sheet. We need the menu «Text» and the tool «Object».
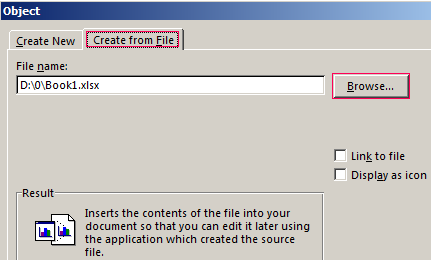
- Select «Create from File» in the dialog box. Click «Browse» to find the text file Prodic1.txt.
- In the «File name:» line will be its data when the desired object will be found. Click OK.
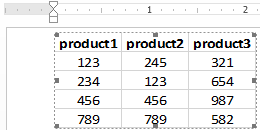
The inserted table is a graphical object. You cannot edit the values in the cells.
You should first remove borders to insert a range of data without boundaries.
In MS Excel:
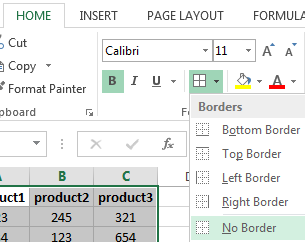
Or use a combination of keys CTRL + SHIFT + (minus).
In MS Word:
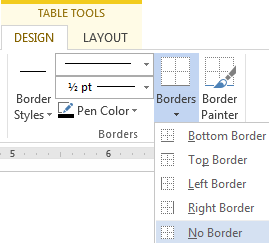
If you want to manipulate the boundaries must be inserted with the 1 and 2 method.
How to convert a table from Word to Excel?
We’ll perform a reverse transfer.
Method 1.
- Select a table in MS Word. Click «Copy» CTRL+C.
- Open MS Excel. Put the mouse in the place where the table should appear. Click «Paste» after right click.
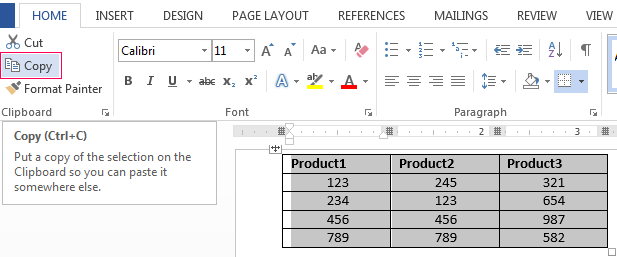
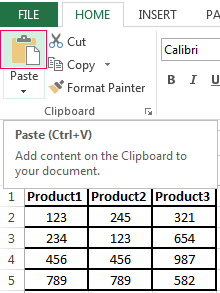
We have a "neat" table. Therefore it inserted smoothly and accurately. If the data were filled ugly with a lot of extra characters (non-printable) so the row and column boundaries may shift. There are 2 outputs to escape from this situation:
- Clean the data manually. If there are a lot of recurring characters you can use AutoCorrect Options.
- Save the spreadsheet as text (in txt format). In this case all the extra characters will be deleted. And then insert the data from the txt to Excel.
Method 2.
- Select the table in Word. Menu «TABLE TOOL» - «LAYOUT» - the tool «Convert to Text». In the parameters of the transformation choose «Tabs».
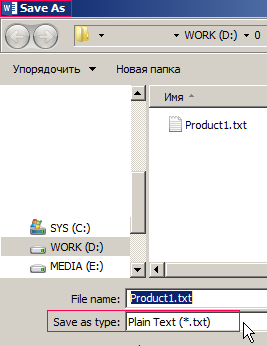
- Go to the main menu – «Save as» - «Save as type». Choose file type «Plain Text (*.txt)».
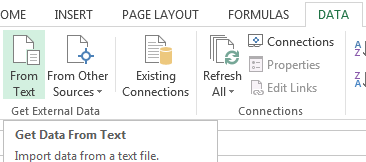
- Open Excel. «DATA» tab. «Get External Data» - «From Text».
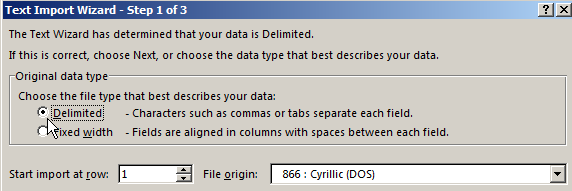
- Now find the saved file. Click «Open». And then the «Text Import Wizard» opens.
- Set the desired conversion settings. Choose data format with delimiters. Separator character is a tab character. Done.

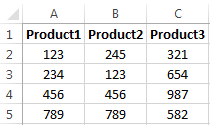
You can edit the data and draw border etc. This method of insertion removes the extra characters and prevents displacement of the cells.
