How Quickly fill empty cells with Excel Formulas
Enhance your Excel skills with simultaneous cell range filling using Excel formulas! Learn how to save time and improve data accuracy. Master advanced Excel formulas techniques and supercharge your productivity.
Filling All Cells in the Selected Range Simultaneously
Filling cells in a range simultaneously is a highly useful function in Excel. It helps us save time and effort. How can you fill a range of cells in Excel all at once?
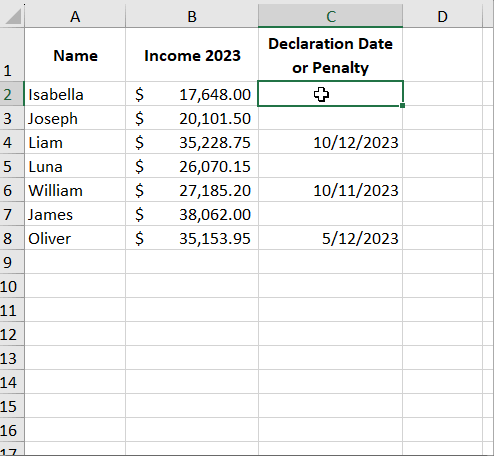
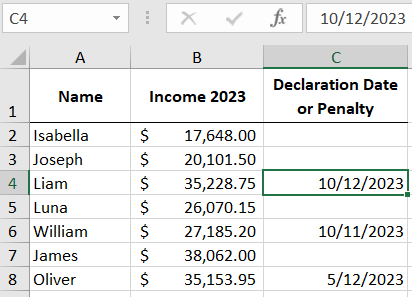
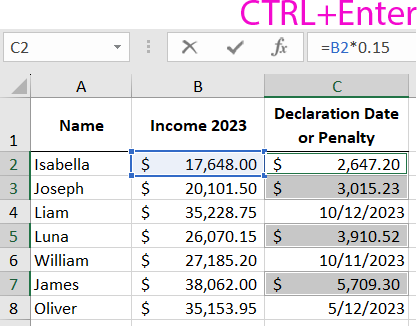
For example, let's simulate a report table for the submission of declarations by a group of responsible employees. If a declaration is not submitted on time, a 15% fine is applied to the income from the previous accounting period. This report is visually represented in the table as shown in the figure:
In the "Declaration Date or Fine" column, some cells contain manually entered data. We need to automatically fill all the empty cells in this column with formulas. How can you quickly and automatically fill non-contiguous empty cells in Excel?
Initially, only unique data (those that do not repeat) are filled in. Therefore, we select non-contiguous ranges where the cell values are the same, meaning the same formula will be in all empty cells in the column. We know how to select non-contiguous cell ranges in Excel from the previous lesson.
Step-by-Step Auto-Filling of Empty Cells in an Excel Column
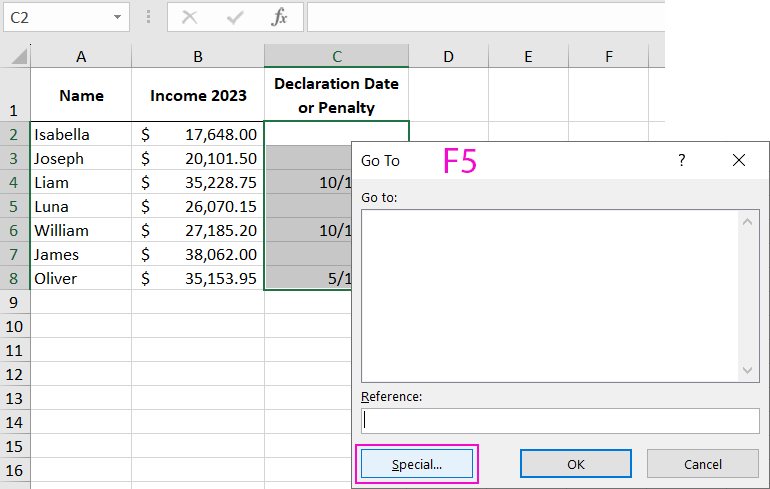
- Select the range of the source column C2:C8 with all its cells and press the F5 key on your keyboard to open the "Go To" dialog (or use the Excel interface menu: HOME ? Editing ? Find & Select ? Go To):
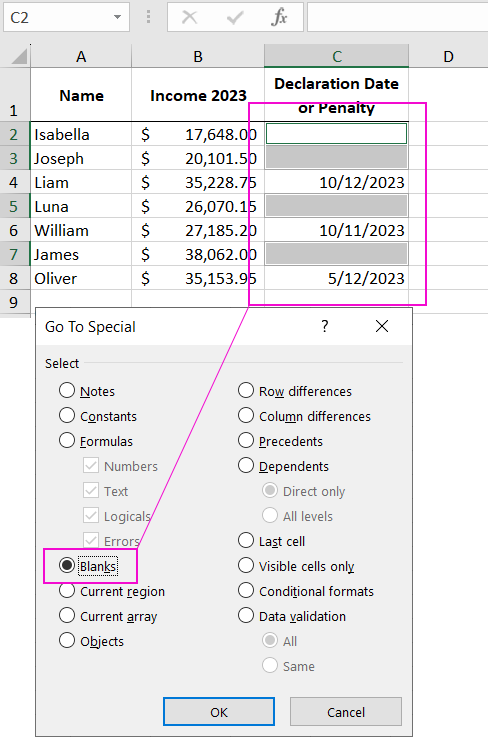
- In the dialog that appears, click on the "Special" button, then in the "Go To Special" window, select the "Blanks" option and click "OK" to select only the empty cells:
- After selecting, enter the formula =B2*0.15 and press the CTRL + Enter key combination. The text will be entered into all selected cells simultaneously!
Note. The location of the active cell within the selected range does not matter—whether it's at the beginning, middle, or end. After entering the text and pressing CTRL+Enter, the result will be the same. The crucial thing is that the range is correctly selected.
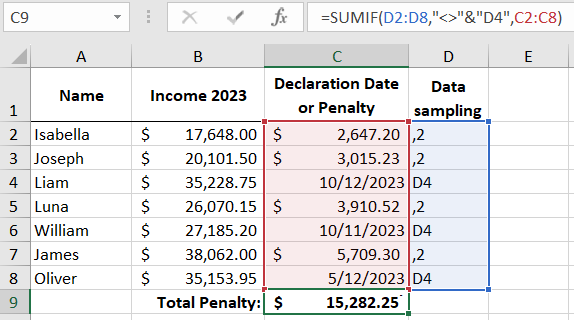
Now, all that's left is to calculate the total fine amount using formulas. Since our column contains two different data types, "Number" and "Date," we can't simply sum all the cells using the =SUM(C2:C8) function. This would lead to incorrect final values. Sometimes these errors are hard to notice since the function doesn't return an error. We need to use a combination of formulas. To simplify the process, we'll accomplish this task in two steps: 1. First, in the adjacent column, we'll mark cell formats for subsequent data selection from the fine column based on conditions. To do this, we'll fill the range in the nearest column D2:D8 with the formula =CELL("format",C2):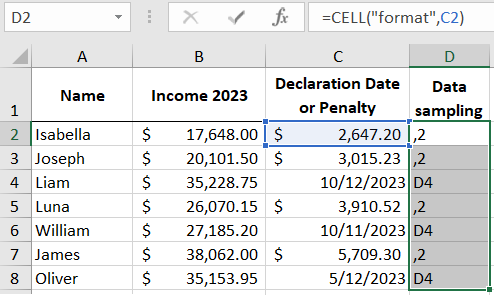 2. In cell C9, we'll enter a formula to sum values in the range C2:C8, but only if the value is not a date. This requires a more complex formula:
=SUMIF(D2:D8,"<>"&"D4",C2:C8)
 Download
As a result, only fines for late declaration submissions have been summed.
